Friday, June 15, 2012

3 Father's Day cards!

Hi all! Father's Day is just around the corner and I've been busy making cards for friends to give , and I may even get mine done in time!! LOL Actually, I got an extra week since my DH won't be home till the 22nd! The kids and I plan to celebrate Dad's special day with him next weekend. cARDS

Here are some of the cards that I've already made....


This was made using stamps from Close To My Heart called Cruisin' Workshop and the matching papers.I masked the car and then stamped the gas pump so it's behind the car. I love this set so much 'cause my little boy loves antique cars , especially his grandpa's!


Moose are a very common sight here in Newfoundland , so I thought I'd  use it for inspiration for a nature style card. I found the moose imageon the Wrap It Up cartridge. I used a Tim Holtz woodgrain embossing folder for the background and a strip of Bella Blvd dp for the strip. Very simple, indeed!


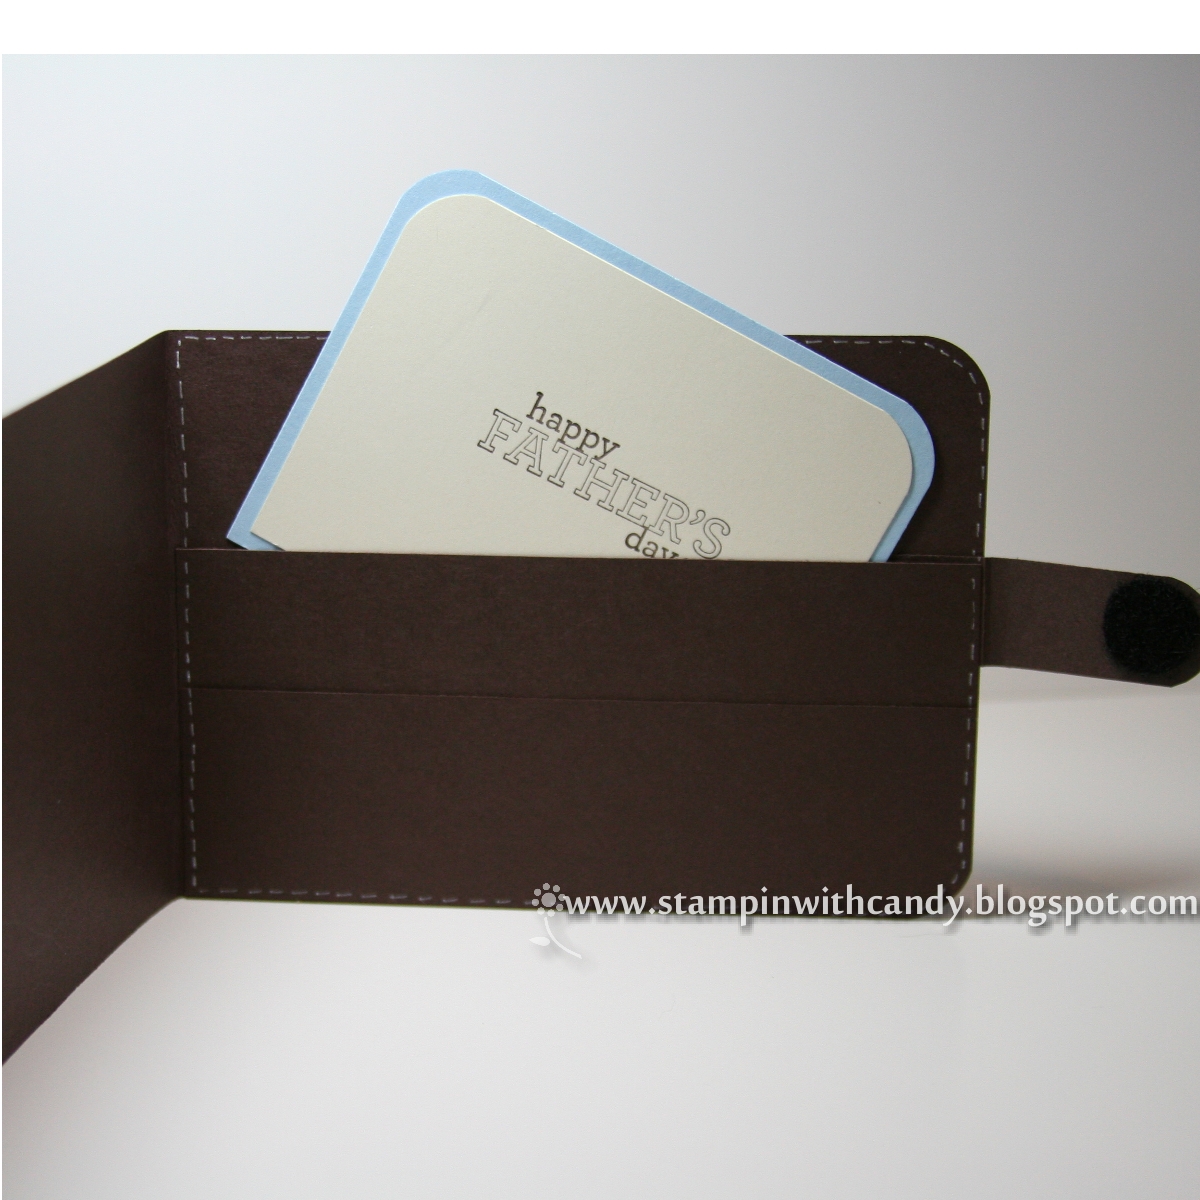
This giftcard holder is a case ( well,sorta) from the Stampin' Success magazine this month. I used my Cricut cartridge Phrases to create the #1 Dad sentiment for the front of the wallet. For the inside I made two pockets; one for the greeting and the other can hold a giftcard or special photo. To get the stitched look, I handdrew white lines on the edge . A velcro closure hold this wallet closed. The plaid dp is retired SU! paper.

Thant's my cards... just need to make that special one for my DH!

Thanks for stopping by blog today.... have a great Father's Day weekend !!


Thursday, June 7, 2012

Graduation Cards : CWC # 89

Hi all! It's that time of year again when the days are long and the kids don't want to come in early on a school night! Thankfully,we have just two weeks left of school and then it's summer break!! Yay! Two months of some R'n'R!! We could all use a little of that!!! I'm busy trying to finish up my son's teacher's gift, but I did finish a few grad cards.


I originally made the black card - lots of playing around with my Cricut carts! I used the grad cap card from Wild Card cut at 8.5 ". I then handcut the hat layer. This card opens up from the top, so the top layer overlaps to hide the fold.


I wanted the slide up when the card was opened, so I created a slit in the card base , but then I had to cover the back of the card to hide the opening!! Yikes, this is turning out to be a lot of steps- not exactly the best idea when making multiples!!! So I simplified the card to this.....


It still looks pretty much the same on the outside ( these are our school colors) . It's just the inside that's different....

It opens to the side now, which meant I had to trace the original and create a template. I tried my Gypsy but I had no luck , so out came my trusty ole' Exacto knife ! Not hard , really and now I have a template for future cards! The sentiment doesn't slide up, thus eliminating the need for a  bottom layer.( Less work = more fun!!!)  The sentiment is from SU! Word Play and is stamped on a mini notepaper I created using my Cricut Imagine ( once I dusted it off- it has not seen much use lately!!) . I found the notepaper image on my Simply Charmed cart and I filled it in with a< lined paper> image ( does that make sense??) from my new Imagine cart, Notebook Doodles.
 I have several of these to make , so the template will come in handy!!

Now that these are finished, I'm gonna submit them over at Cooking With Cricut for their challenge #89- Graduation/ end of school year. Go check them out!!!

 Thanks for stopping by my blog today!